Lunar New Year has been celebrated in San Francisco since the first Chinese immigrants landed on its shores in the 1840s.
The fast-growing city, with its enormous wealth and opportunity was, in those days, as much a symbol of the prosperity and abundance of the holiday as the traditions brought from across the sea. So it was only fitting that, within 20 years of their arrival, the Chinese community had spawned a new ritual fusing Chinese heritage with an American celebration never before seen back home: A parade.
More than 150 years later, although the Chinese New Year’s Parade has spread across the world, the OG San Francisco event remains the largest. It’s a tradition Chinese-American chef Brandon Jew, of Mister Jiu’s and Mamahuhu, says is truly memorable.
“As a kid, my kung-fu school would always be in parade and it felt like such a big stage for our small school,” he says. “Now that I have a two-year old son, it’s important to have him understand our family traditions and the festivities in Chinatown.”
But the parade is just one element of a holiday steeped in symbolism and tradition. First, there are the 12 zodiac animals that guide the year ahead, each one endowed with its own laundry list of meaningful characteristics that Jew says he’s become more superstitious about over the last five years. In 2024, it’s the dragon’s turn—the bringer of wisdom, strength, and good luck—and soon five of the fire breathers will be installed around the city to usher in the coming year.
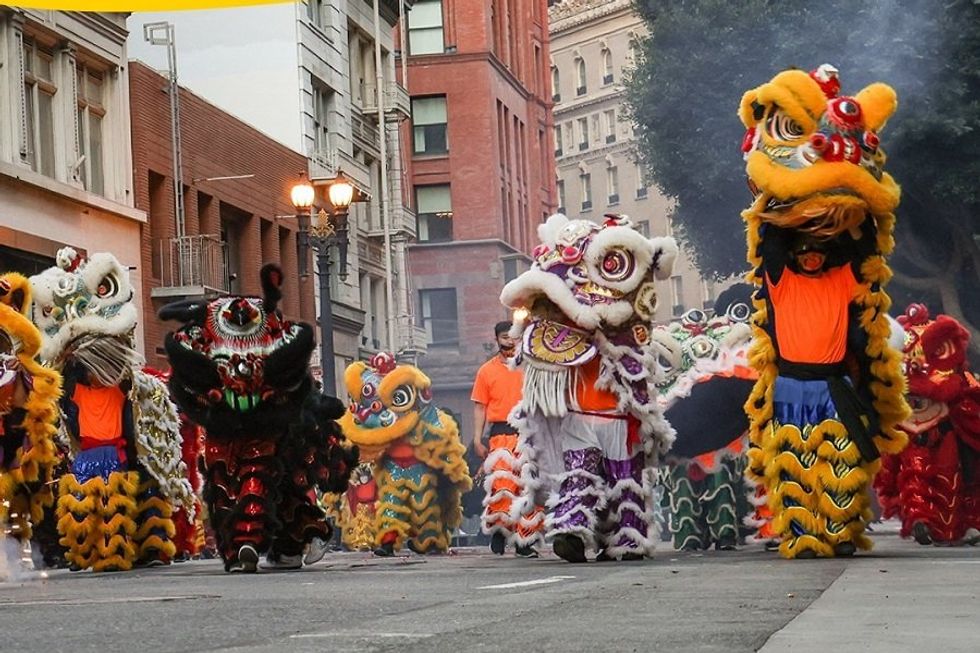 Lion Dancers at the Chinese New Year Parade.(Courtesy of @chineseparade)
Then there’s the cleaning, an essential task to ready the home for prosperity to come. “Cleaning all the corners ensures that you have let go of the past year and that your home is ready to take in all the good luck for the new year,” Jew explains.
One of the most popular Lunar New Year traditions is lai see (hongbao in Mandarin), the lucky red envelopes (the color red keeps bad spirits at bay) stuffed with money that married people gift to the young and unmarried. To do it right, the bills must be crisp and new, but to get them, you’ll have to go to the bank early, says Jew. “In the Bay Area, banks around this time are used to fulfilling the request but some branches will run out.”
And like every good celebration, Lunar New Year has its own set of essential food traditions, ranging from sticky rice, which represents togetherness, to lucky fruits like oranges, grapes, plus, and kumquats.
As a kid, Jew’s favorite part of the holiday was “visiting all my family members and getting lai see, then having a big banquet at my grandma’s house,” he says. Now, as Mr. Jiu’s lauded chef, he’s the one cooking the feast, starting with fish, the Chinese pronunciation of which means “surplus” or “abundance.” It will be accompanied by a variety of other symbolic eats, including longevity noodles, nian gao (sweet rice cakes), tong yuen (black sesame-filed rice balls), and a variety of citrus elements.
Mister Jiu’s will be just one of many places serving up festive dishes for the New Year. Chinatown’s legacy restaurants have been preparing them for decades. “Far East Cafe (631 Grant Ave.), New Loey Wo Goey (699 Jackson St.), Capital (839 Clay St.), Yuet Lee (1300 Stockton St.), Hing Lung (1261 Stockton St.), and Kam Po (801 Broadway) each have special dishes that I think need to be appreciated. They have served generations of San Franciscans.”
Whether he’ll get the time to go to one himself this holiday season, however, still remains to be seen. Jew’s usually so busy around Lunar New Year that he turns more often to Mamahuhu’s frozen potstickers than to restaurants. Anyone in a similar time crunch can still participate in at least one New Year tradition courtesy of the restaurant: Order a bag or two of the potstickers from Mamahuhu online by February 10th and good luck might just come your way in the form of a custom-designed red envelope.
No matter his schedule, though, there’s at least one event Jew will definitely make time for: watching his son’s favorite performers, the lion dancers. “Going to visit Chinatown is the season’s real festivity,” he says.
Recipe: Mister Jiu's Winter Pot Stickers
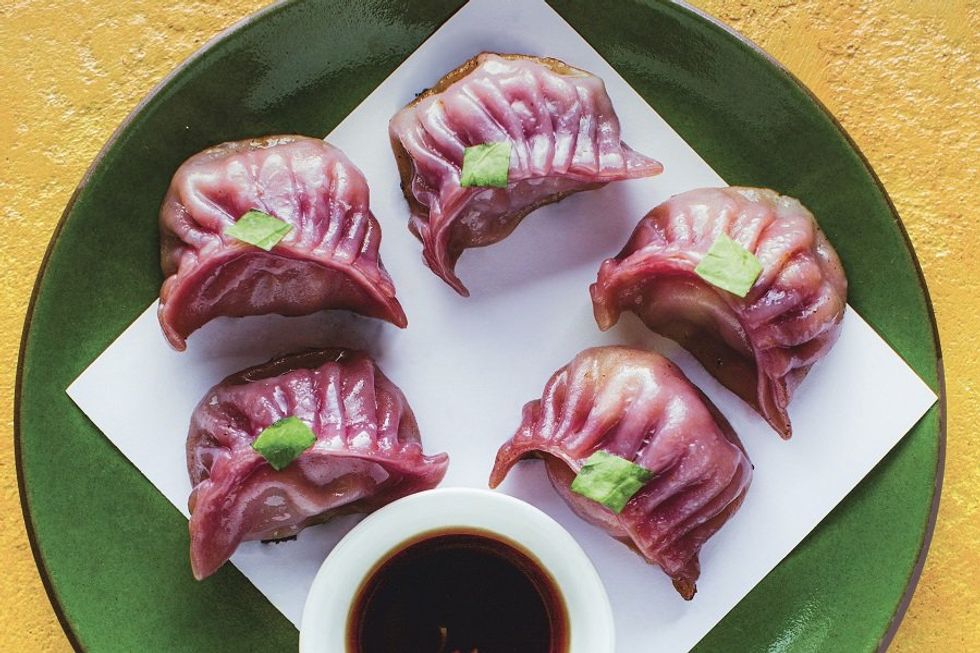
(Pete Lee for 'Mister Jiu's in Chinatown: Recipes and Stories from the Birthplace of Chinese American Food')
There's nothing like pot stickers on a cool, winter's day. Chef Jew shared his version with us, which is tinted with the lucky color red using cabbage juice.
Ingredients
Pot Sticker Wrappers
1 1/4 cups / 300ml juiced red cabbage (see below)
3 cups / 420g all-purpose flour
1 1/2 tsp kosher salt
Pot Sticker Filling
12 oz / 340g pork shoulder, cut into 1-inch pieces
3 oz / 85g pork back fat, cut into 1-inch pieces
2 1/2 lbs / 1.1 kg red cabbage + 1 1/2 tsp kosher salt
3/4 cup / 45g thinly sliced (crosswise) green onions
2 Tbsp plus 1 tsp peeled and finely chopped ginger
1 Tbsp toasted sesame oil
1 Tbsp kosher salt
1 tsp ground white pepper
1/2 cup / 120ml neutral oil
Water as needed
Fresh sorrel leaves for garnishing (optional)
Chinese black vinegar for dipping
Thread-cut peeled young ginger for dipping
To make the red cabbage juice:
Cut the core from the cabbage, then cut the cabbage into 11⁄2-inch-wide wedges. Set aside 8 oz / 225g. Juice the remaining cabbage with a juicer.
To make the wrappers:
Set a fine-mesh strainer over a small saucepan. Pour the juice through, pressing on the solids with a spoon to extract as much juice as possible; discard the solids. Set the strained juice over medium heat and bring to a simmer.
In the bowl of a stand mixer fitted with the dough hook attachment, combine the flour and salt. With the mixer on low speed, slowly pour in 1 cup plus 2 Tbsp / 265ml of the juice and mix until a dough forms into a fairly smooth ball around the hook, about 10 minutes. If the flour is not completely incorporated after 2 minutes, add more juice, 1/2 Tbsp at a time. If mixing by hand, mix together the flour and salt in a bowl and add the juice a little at a time, kneading the dough until smooth. Form the dough into a smooth ball and let rest in the bowl, covered with a damp kitchen towel, for 30 minutes. The dough should now look super-smooth, feel soft, and slowly spring back when you poke it.
Divide the dough into six pieces of roughly the same size. If using a pasta roller, roll one piece at a time (keep the rest covered), starting at the thickest setting and moving down incrementally until slightly more than 1/16 inch thick (setting 4 on a KitchenAid pasta roller), doing your best to roll out a wide sheet. Roll the dough through twice on this final setting. If rolling by hand, lightly flour a rolling pin and roll each piece out to 1/16 inch thick. Using a 3 1/2-inch round cutter, cut out circles of dough, layering the rounds between sheets of parchment paper and covering the top layer with a damp kitchen towel. Gather up the dough scraps, reroll, and cut until you have about forty wrappers. Leave covered with a damp kitchen towel and refrigerate until ready to use, up to 2 days.
To make the filling:
In a medium bowl, using your hands, roughly mix together the pork shoulder and back fat. Using a meat grinder, grind the pork and fat through a coarse grinding plate (1/4-inch / 6mm holes) into the medium bowl. Grind again through a fine grinding plate (1/8-inch / 3mm holes) into the bowl of a stand mixer. Place the bowl in a stand mixer fitted with the paddle attachment.
Cut the reserved 8 oz / 225g cabbage into fine shreds. In a colander, toss with the salt and leave to drain in the sink for 1 hour. Squeeze as much moisture from the cabbage as possible with your hands.
Add the cabbage, green onions, ginger, sesame oil, salt, and pepper; and mix on medium-low speed until the mixture forms a sticky paste (don’t worry too much about overworking), about 2 minutes. If mixing by hand, vigorously mix the ground pork and the rest of the ingredients together in a large bowl with a wooden spoon until it comes together as a sticky paste. Line a rimmed baking sheet with parchment paper. Uncover six of the wrappers at a time (keep the rest under a damp kitchen towel while working).
Spoon 1 Tbsp filling in the center of a wrapper and flatten a bit. Fold the wrapper in half by bringing the bottom up to the top, but don’t yet seal firmly. Starting at one end, pleat the front edge of the wrapper and then pinch the pleat with the back edge until completely sealed, about eight pleats. Hold the pot sticker by the pleats and gently plop it down on the baking sheet to form a flat bottom. Repeat until all the filling is used up. If at any point the wrappers start to dry out and stop sealing when pinched together, trace the edges of the wrapper with a water-dampened finger. (If not cooking right away, refrigerate the pot stickers on the baking sheet, covered with a damp kitchen towel, for up to 1 day. You can also freeze them solid, uncovered on the baking sheet, then transfer to a freezer bag and store in the freezer for up to 2 months. Cook from frozen; do not thaw first.)
Preheat the oven to 200°F. In a large nonstick frying pan over medium-high heat, warm 2 Tbsp of the neutral oil until shimmering. Add the pot stickers in batches of about a dozen. (The exact number depends on the size of your pan and dumplings. To get the dumplings to stick, they need to entirely fill the pan without touching.) Leave in the oil for about 1 minute; get the lid ready as you carefully add 1/4 cup / 60ml water to the bottom of the pan (the water should barely cover the bottom of the dumplings). Cover immediately and leave to steam for about 4 minutes. (If the pot stickers are frozen, steam for 5 to 6 minutes.) Try not to check on them by lifting the cover or moving them around. This is where a glass lid is handy—when the steam clears, you have just a few minutes of cooking to go.
Uncover the pot stickers and continue to leave them alone (let them stick to the pan; it should feel like you’re taking them to the edge of burnt) until they have developed a golden brown crust on the bottom, 2 to 3 minutes more. Using a thin spatula, release the pot stickers and transfer to a platter and place in the oven. If burnt bits form, wipe out the pan before adding more oil for the next round.
Let the pot stickers cool for a minute or two before serving, crowned with a sorrel leaf, if desired, and shallow dishes of black vinegar with a small pile of ginger threads for dipping.
Reprinted with permission from Mister Jiu’s in Chinatown: Recipes and Stories from the Birthplace of Chinese American Food by Brandon Jew and Tienlon Ho, copyright © 2021. Published by Ten Speed Press, an imprint of Penguin Random House.